> ## Documentation Index
> Fetch the complete documentation index at: https://cometchat-22654f5b-docs-uikit-customization-architecture.mintlify.site/llms.txt
> Use this file to discover all available pages before exploring further.
# UI Components
> UI Components — CometChat documentation.
**UI Components** are building blocks of the UI Kit. **UI Components** are a set of custom classes specially designed to build a rich chat app. There are different UI Components available in the UI Kit Library.
## 1. CometChatUI
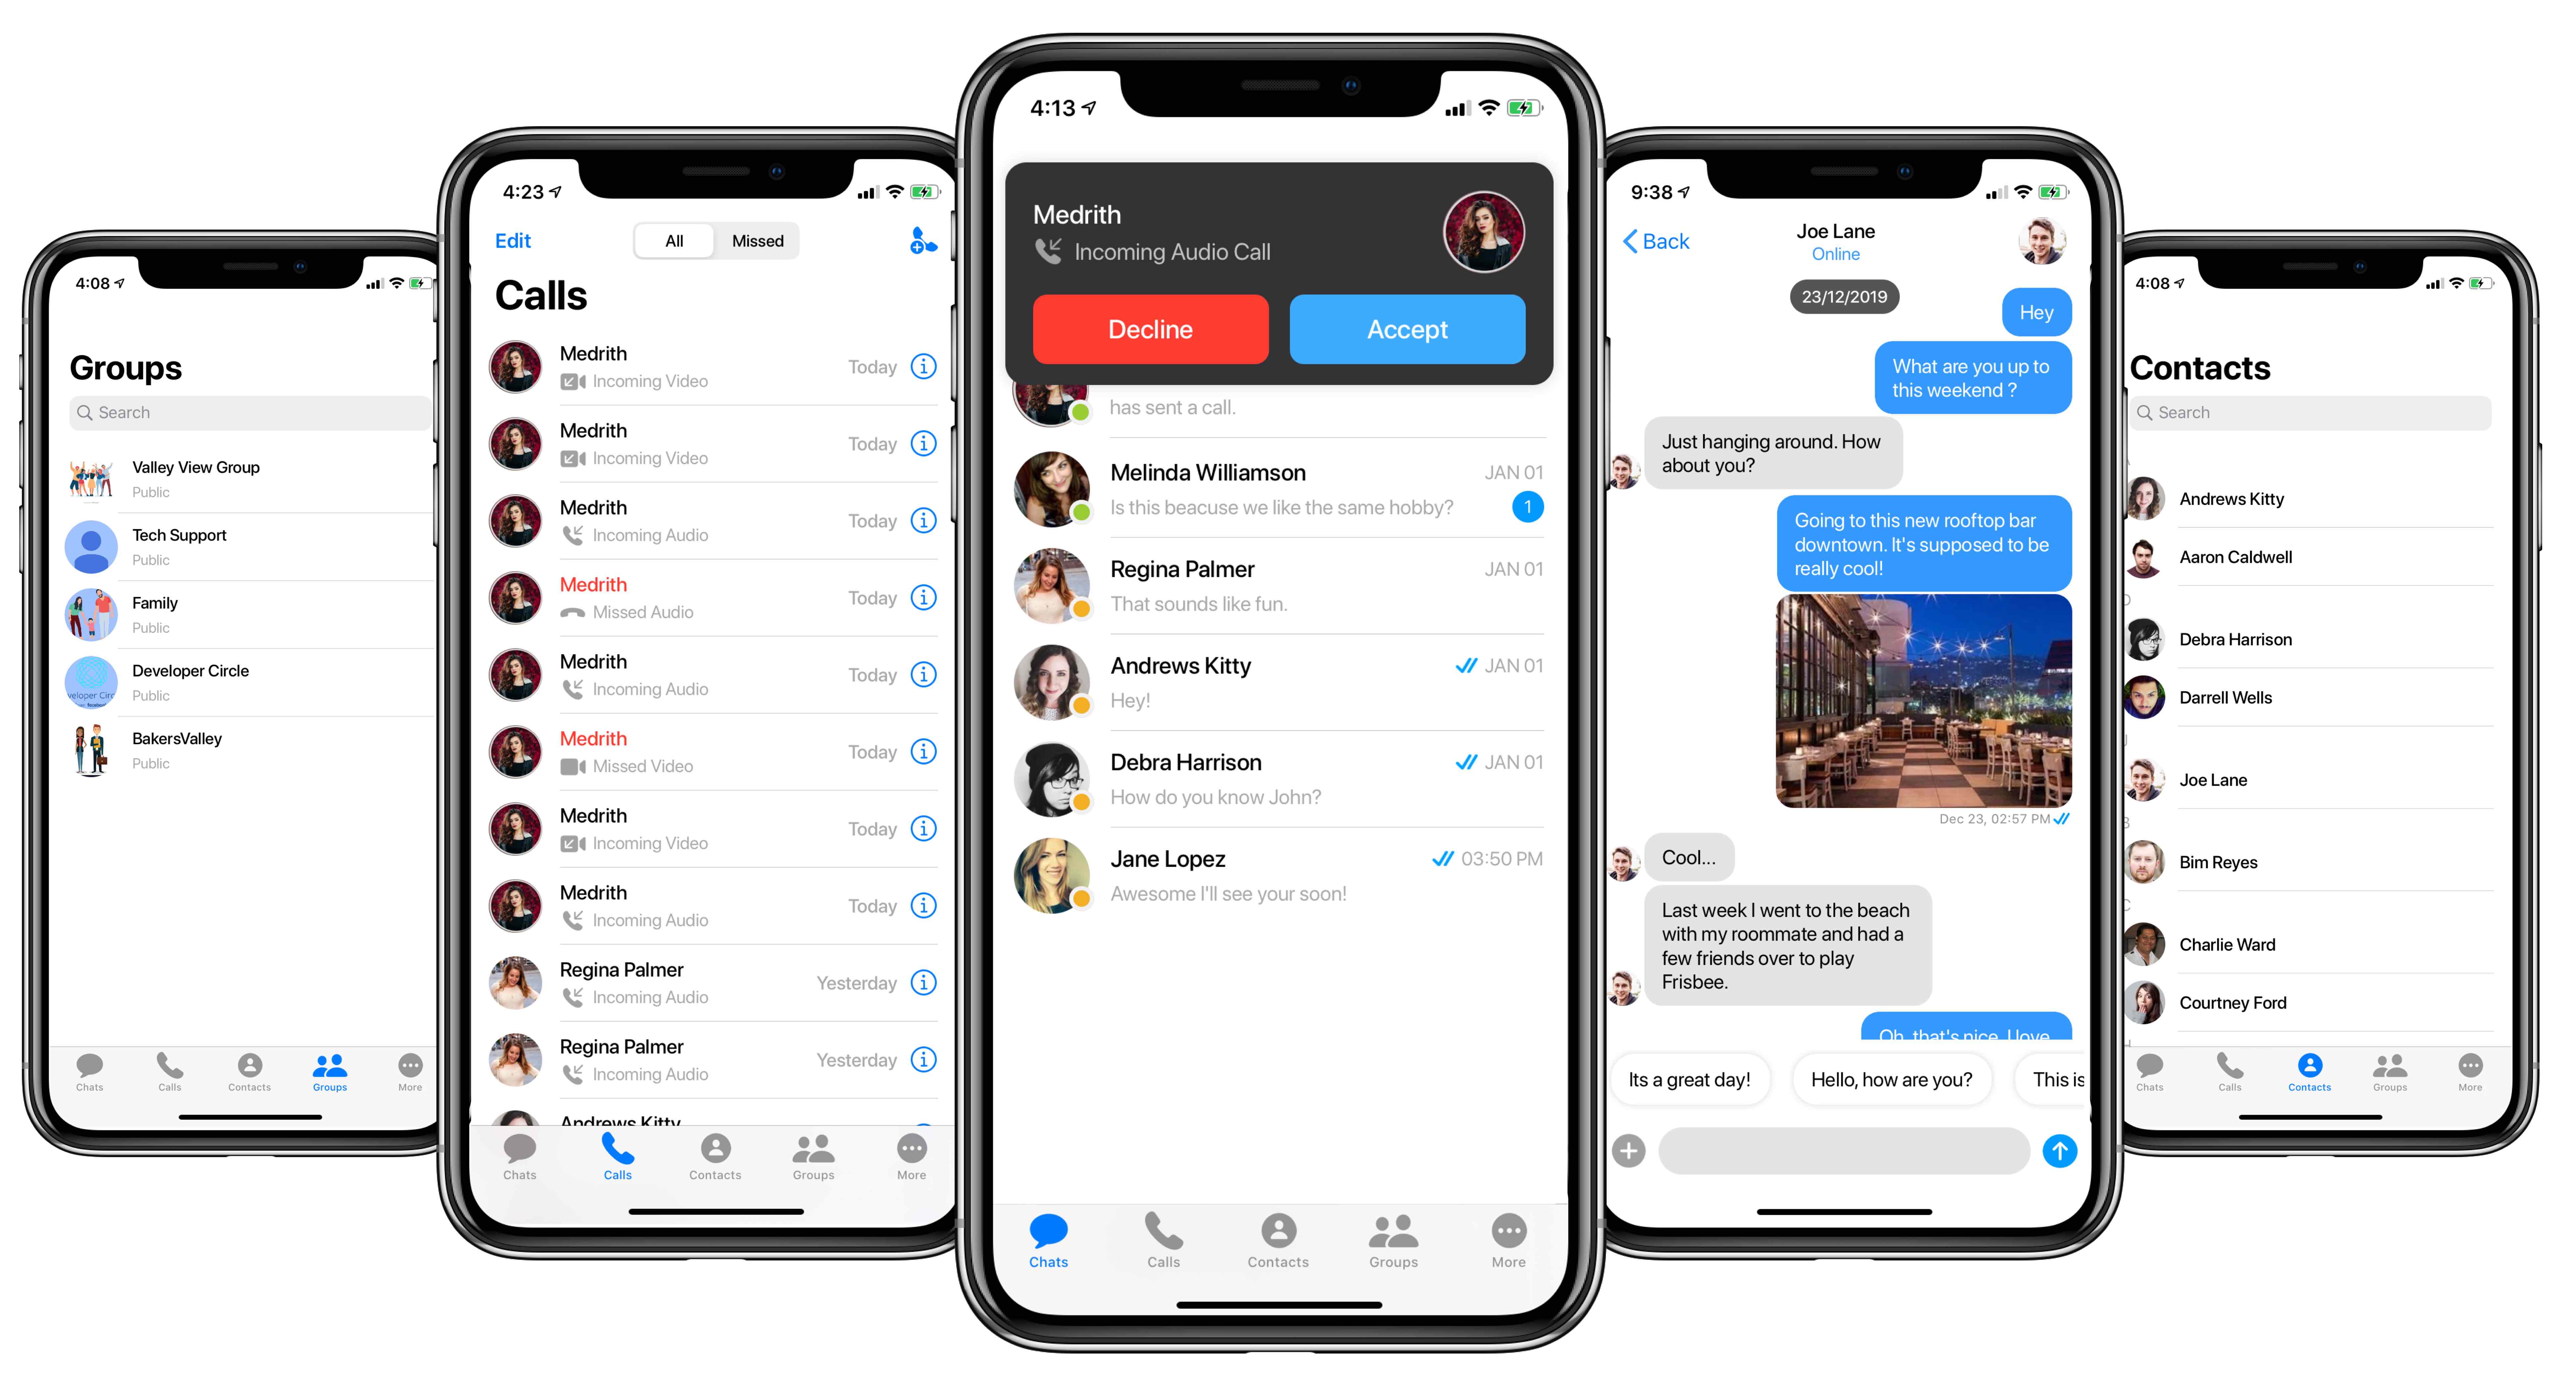
**CometChatUI** is an option to launch a fully functional chat application using the UI Kit. In **CometChatUI** all the **UI Components** are interlinked and work together to launch a fully functional chat on your mobile application.
 ```swift theme={null}
DispatchQueue.main.async {
let cometChatUI = CometChatUI()
cometChatUI.setup(withStyle: .fullScreen)
self.present(cometChatUI, animated: true, completion: nil)
}
```
## 2. CometChatConversationList
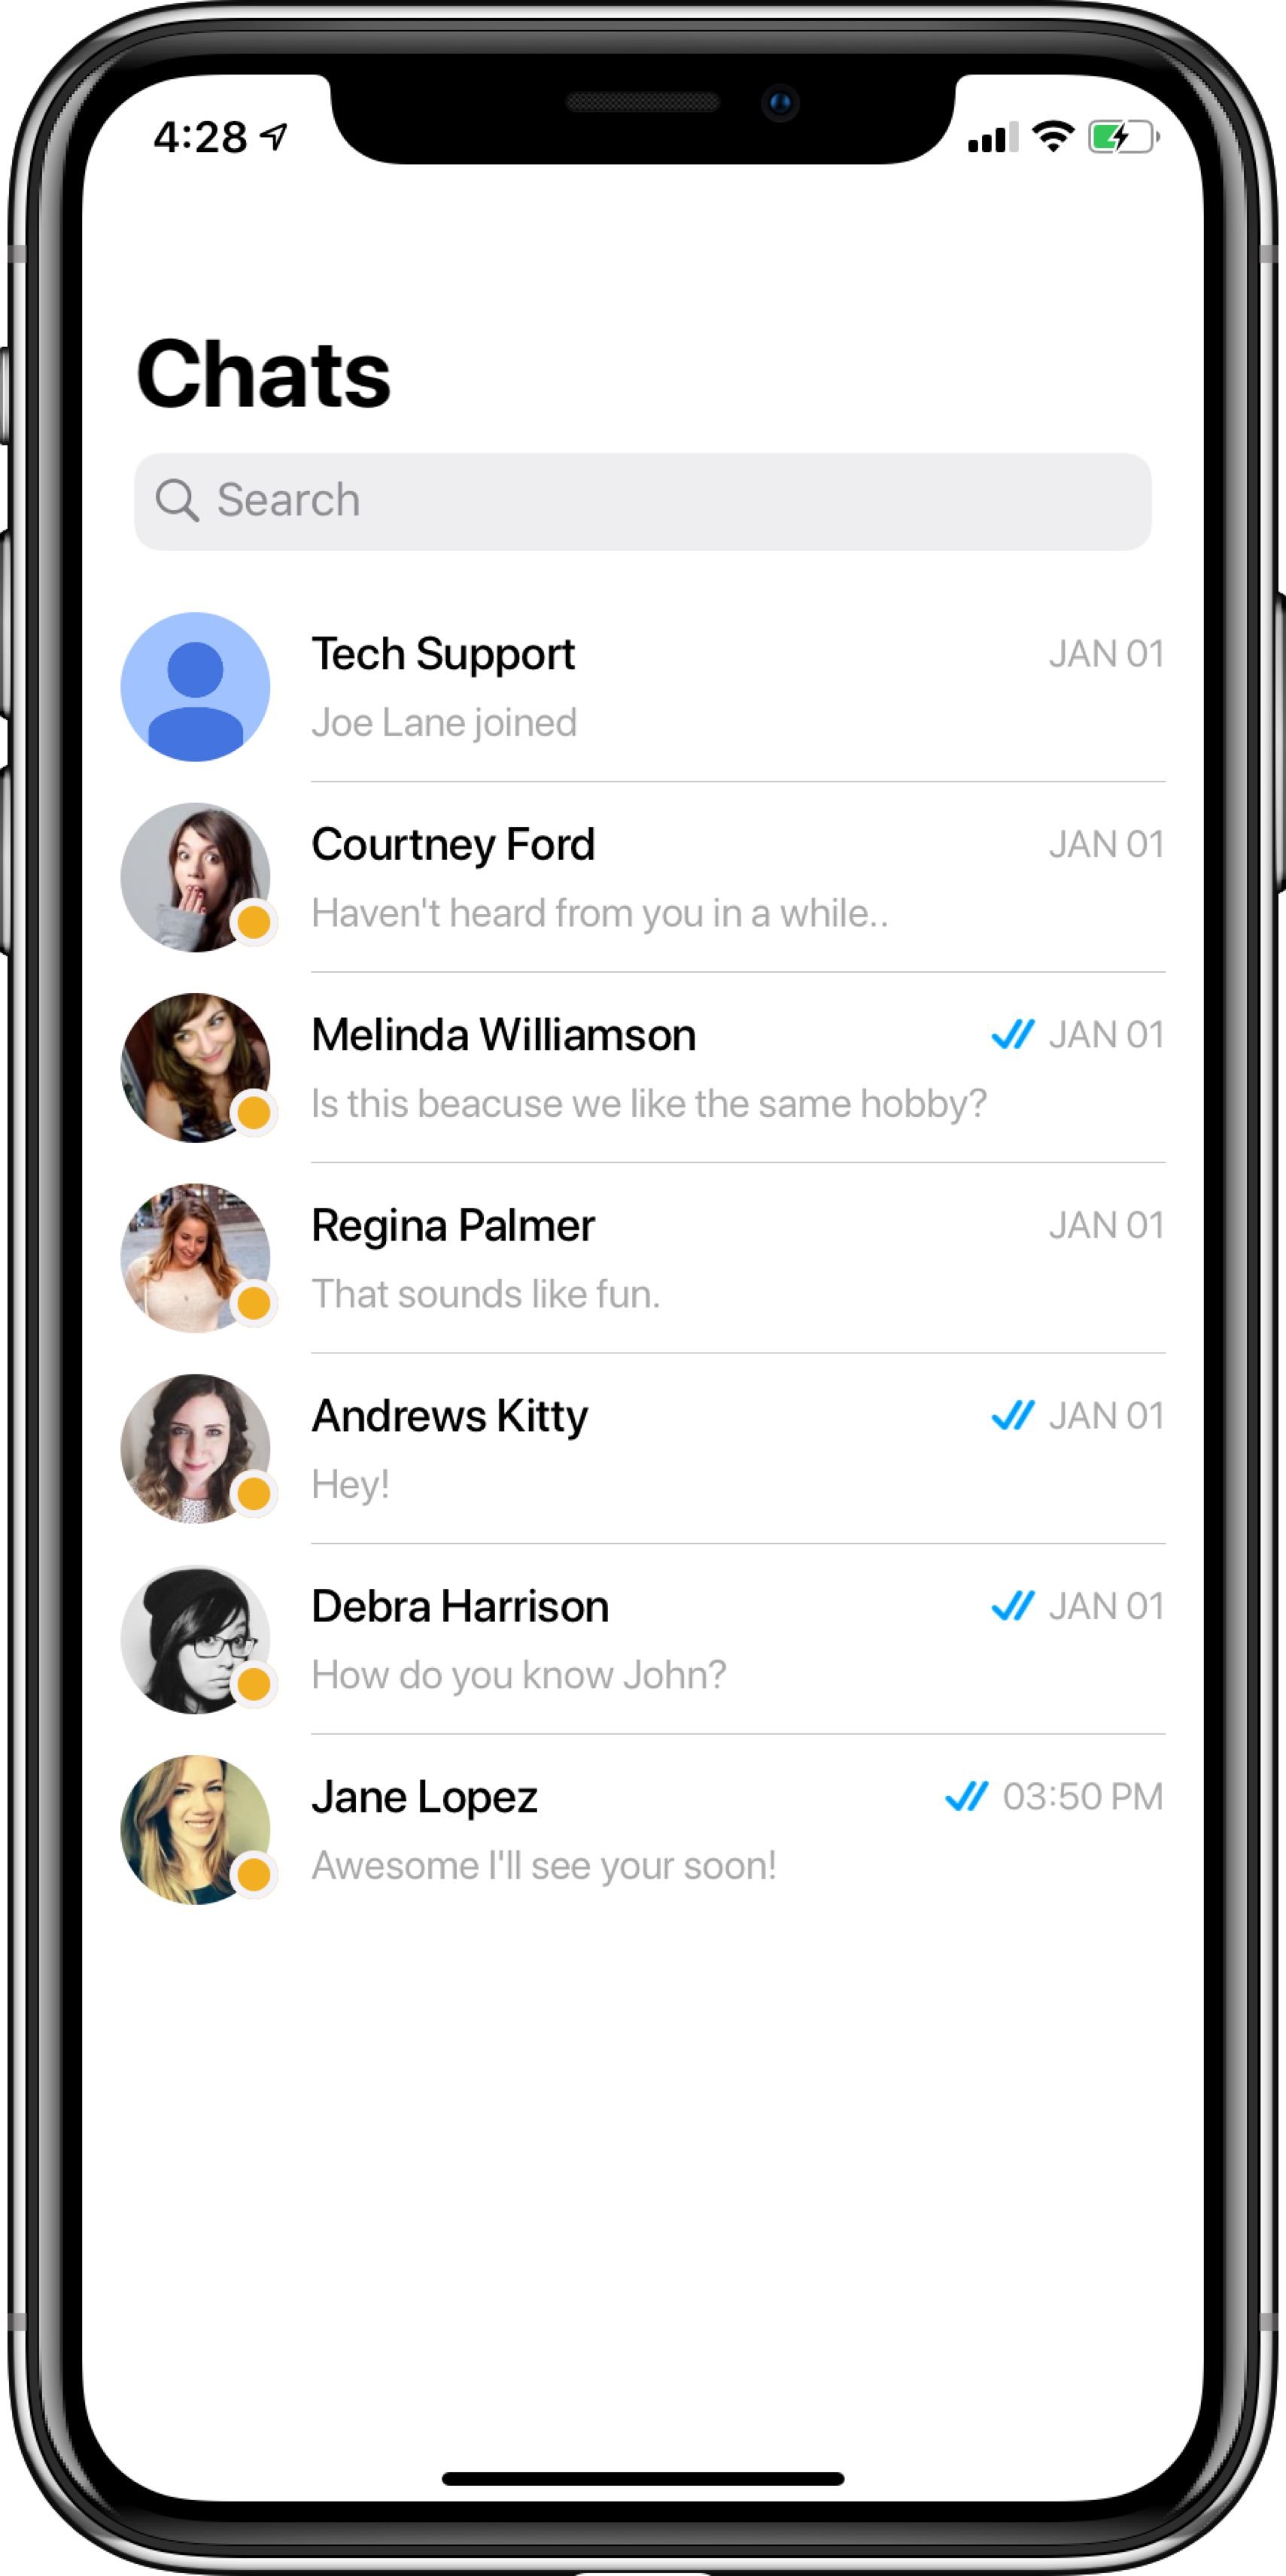
The **CometChatConversationList** is a view controller with a list of recent conversations. The view controller has all the necessary delegates and methods.
You can present this screen using **two methods.**
### Launch Conversation List (Recommended)
```swift theme={null}
let conversationList = CometChatConversationList()
let navigationController = UINavigationController(rootViewController:conversationList)
conversationList.set(title:"Chats", mode: .automatic)
self.present(navigationController, animated:true, completion:nil)
```
```swift theme={null}
DispatchQueue.main.async {
let cometChatUI = CometChatUI()
cometChatUI.setup(withStyle: .fullScreen)
self.present(cometChatUI, animated: true, completion: nil)
}
```
## 2. CometChatConversationList
The **CometChatConversationList** is a view controller with a list of recent conversations. The view controller has all the necessary delegates and methods.
You can present this screen using **two methods.**
### Launch Conversation List (Recommended)
```swift theme={null}
let conversationList = CometChatConversationList()
let navigationController = UINavigationController(rootViewController:conversationList)
conversationList.set(title:"Chats", mode: .automatic)
self.present(navigationController, animated:true, completion:nil)
```
 ### Embed Conversation List in View Controller
You can use this by subclassing UIViewController as **CometChatConversationList** as shown below:
> To assign a CometChatConversationList to view controller make sure that the Navigation controller is attached properly.
```swift theme={null}
import CometChatPro
class viewController: CometChatConversationList {
override func viewDidLoad() {
super.viewDidLoad()
self.delegate = self
}
}
```
Also, you can perform an action on tap on the conversation by adding **ConversationListDelegate** in the app's view controller as shown below:
```swift theme={null}
extension viewController: ConversationListDelegate {
func didSelectConversationAtIndexPath(conversation: Conversation, indexPath: IndexPath){
//Do Stuff
}
}
```
## 3. CometChatCallsList
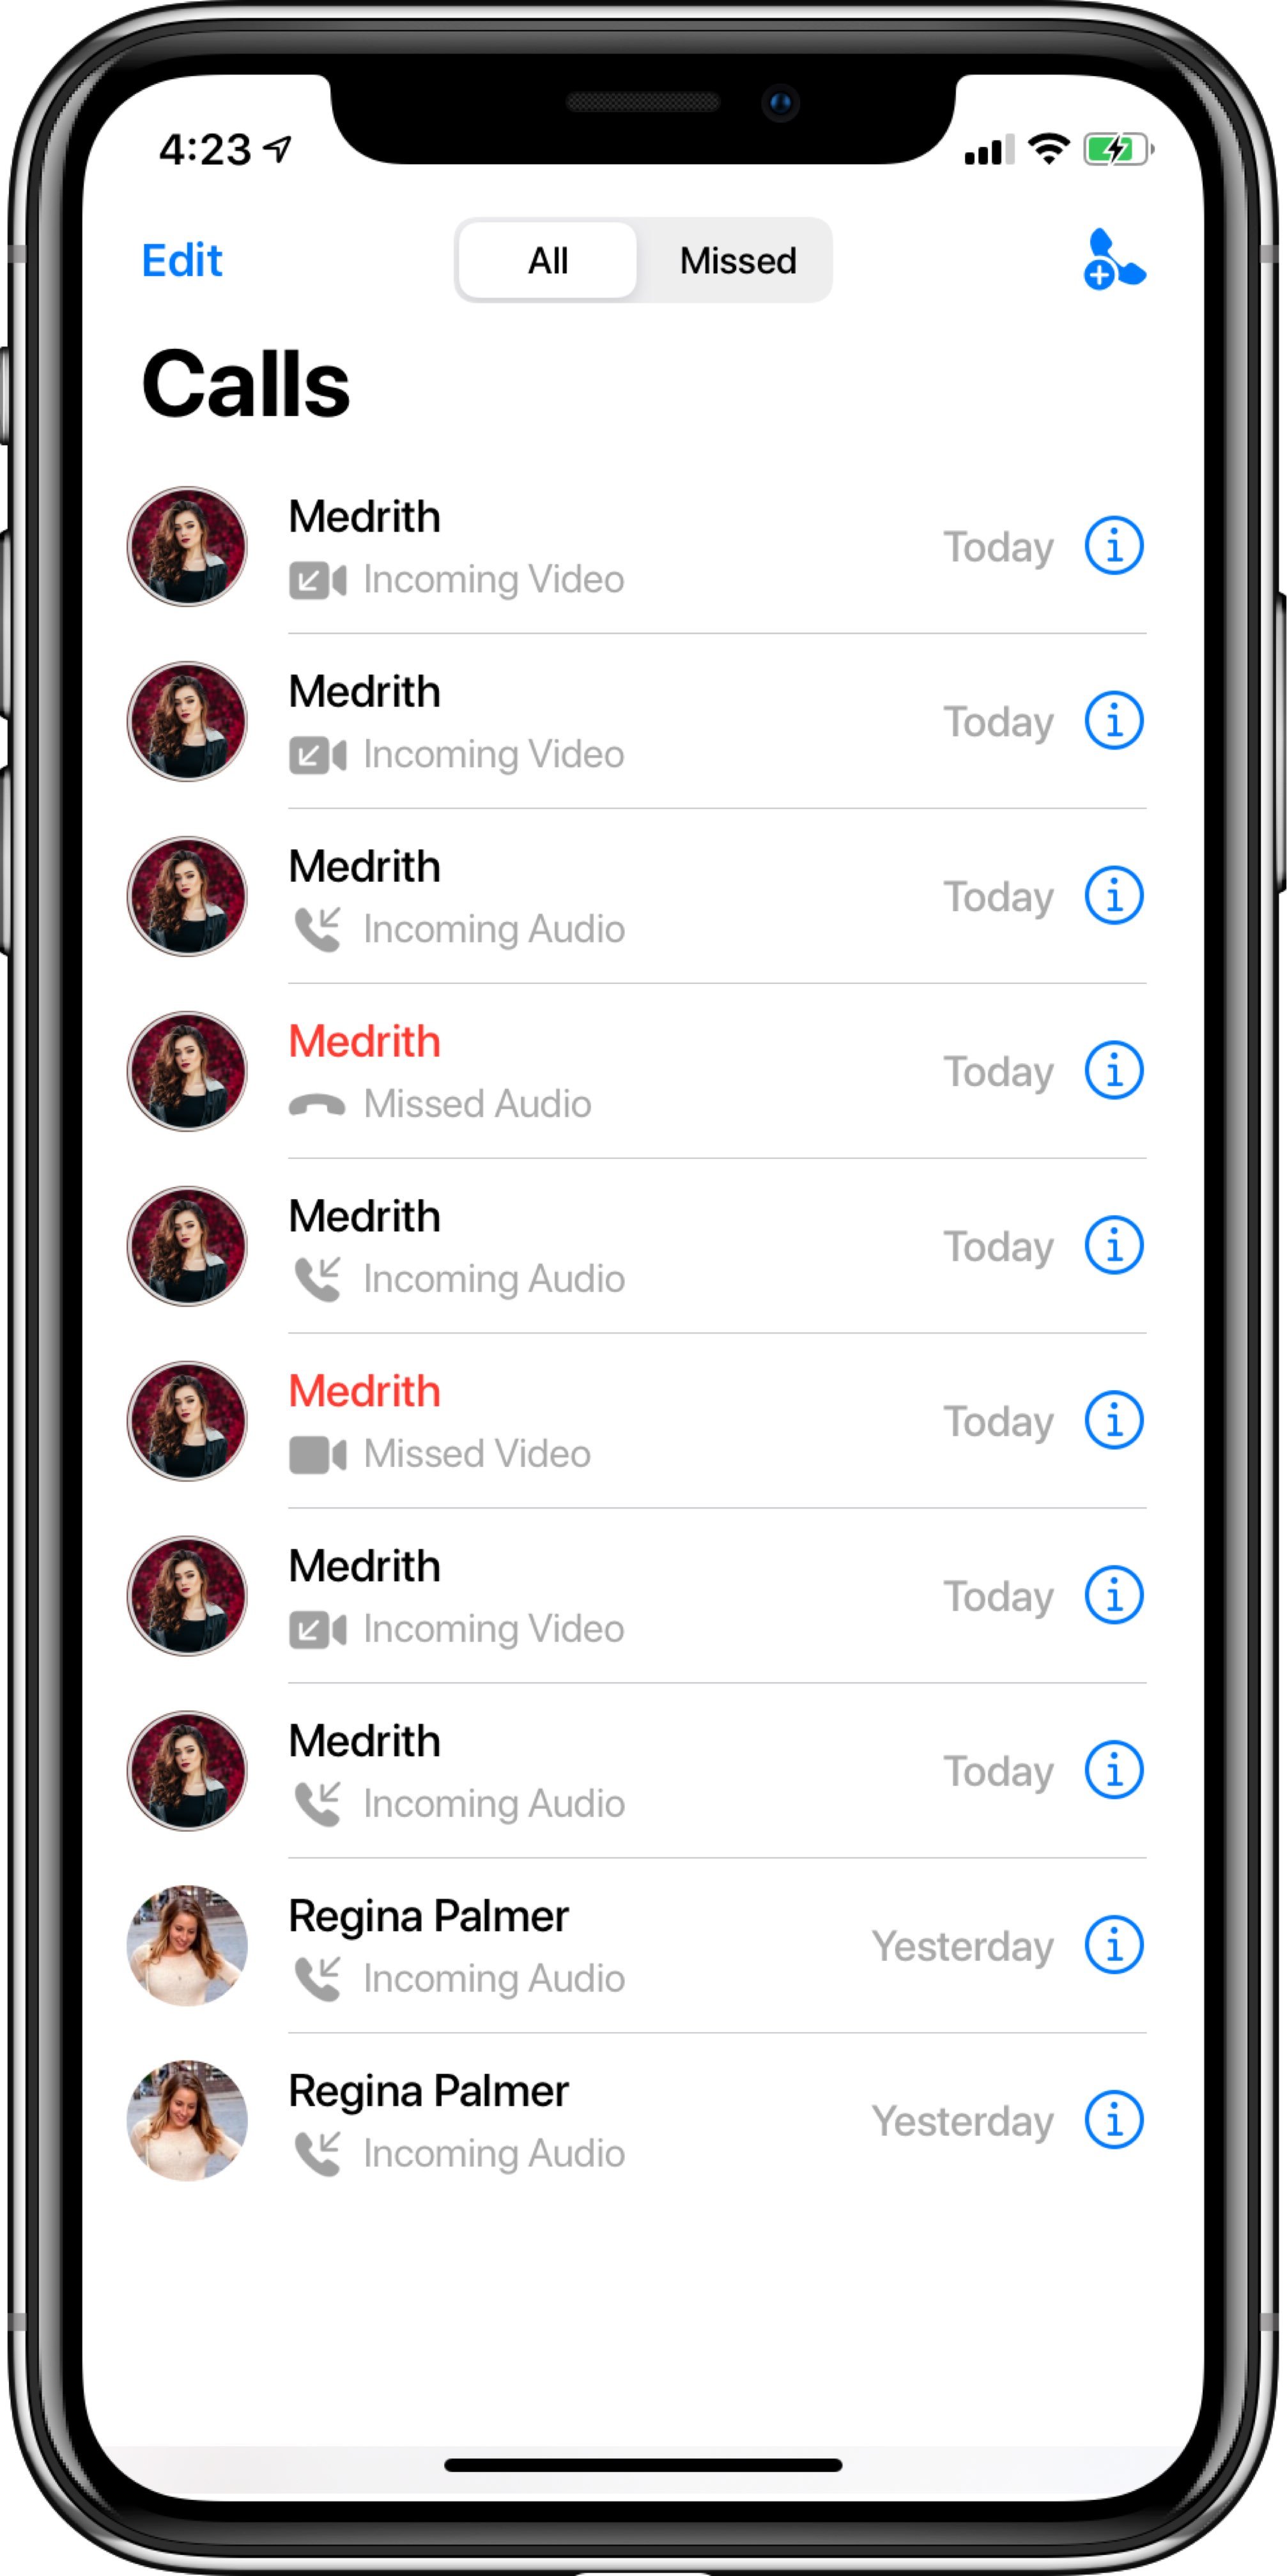
The **CometChatCallsList** is a view controller with a list of recent calls. The view controller has all the necessary delegates and methods.
You can present this screen using **two methods.**
### Launch Calls List (Recommended)
```swift theme={null}
let callList = CometChatCallsList()
let navigationController = UINavigationController(rootViewController:callList)
callList.set(title:"Calls", mode: .automatic)
self.present(navigationController, animated:true, completion:nil)
```
### Embed Conversation List in View Controller
You can use this by subclassing UIViewController as **CometChatConversationList** as shown below:
> To assign a CometChatConversationList to view controller make sure that the Navigation controller is attached properly.
```swift theme={null}
import CometChatPro
class viewController: CometChatConversationList {
override func viewDidLoad() {
super.viewDidLoad()
self.delegate = self
}
}
```
Also, you can perform an action on tap on the conversation by adding **ConversationListDelegate** in the app's view controller as shown below:
```swift theme={null}
extension viewController: ConversationListDelegate {
func didSelectConversationAtIndexPath(conversation: Conversation, indexPath: IndexPath){
//Do Stuff
}
}
```
## 3. CometChatCallsList
The **CometChatCallsList** is a view controller with a list of recent calls. The view controller has all the necessary delegates and methods.
You can present this screen using **two methods.**
### Launch Calls List (Recommended)
```swift theme={null}
let callList = CometChatCallsList()
let navigationController = UINavigationController(rootViewController:callList)
callList.set(title:"Calls", mode: .automatic)
self.present(navigationController, animated:true, completion:nil)
```
 ### Embed Call List in View Controller
You can use this by subclassing UIViewController as **CometChatCallsList** as shown below:
> To assign a CometChatCallsList to view controller make sure that the Navigation controller is attached properly.
```swift theme={null}
import CometChatPro
class viewController: CometChatCallsList {
override func viewDidLoad() {
super.viewDidLoad()
self.delegate = self
}
}
```
Also, you can perform an action on tap on the call by adding **CallsListDelegate** in the app's view controller as shown below:
```swift theme={null}
extension viewController: CallsListDelegate {
func didSelectCallsAtIndexPath(call: BaseMessage, indexPath: IndexPath){
//Do Stuff
}
}
```
## 4. CometChatUserList
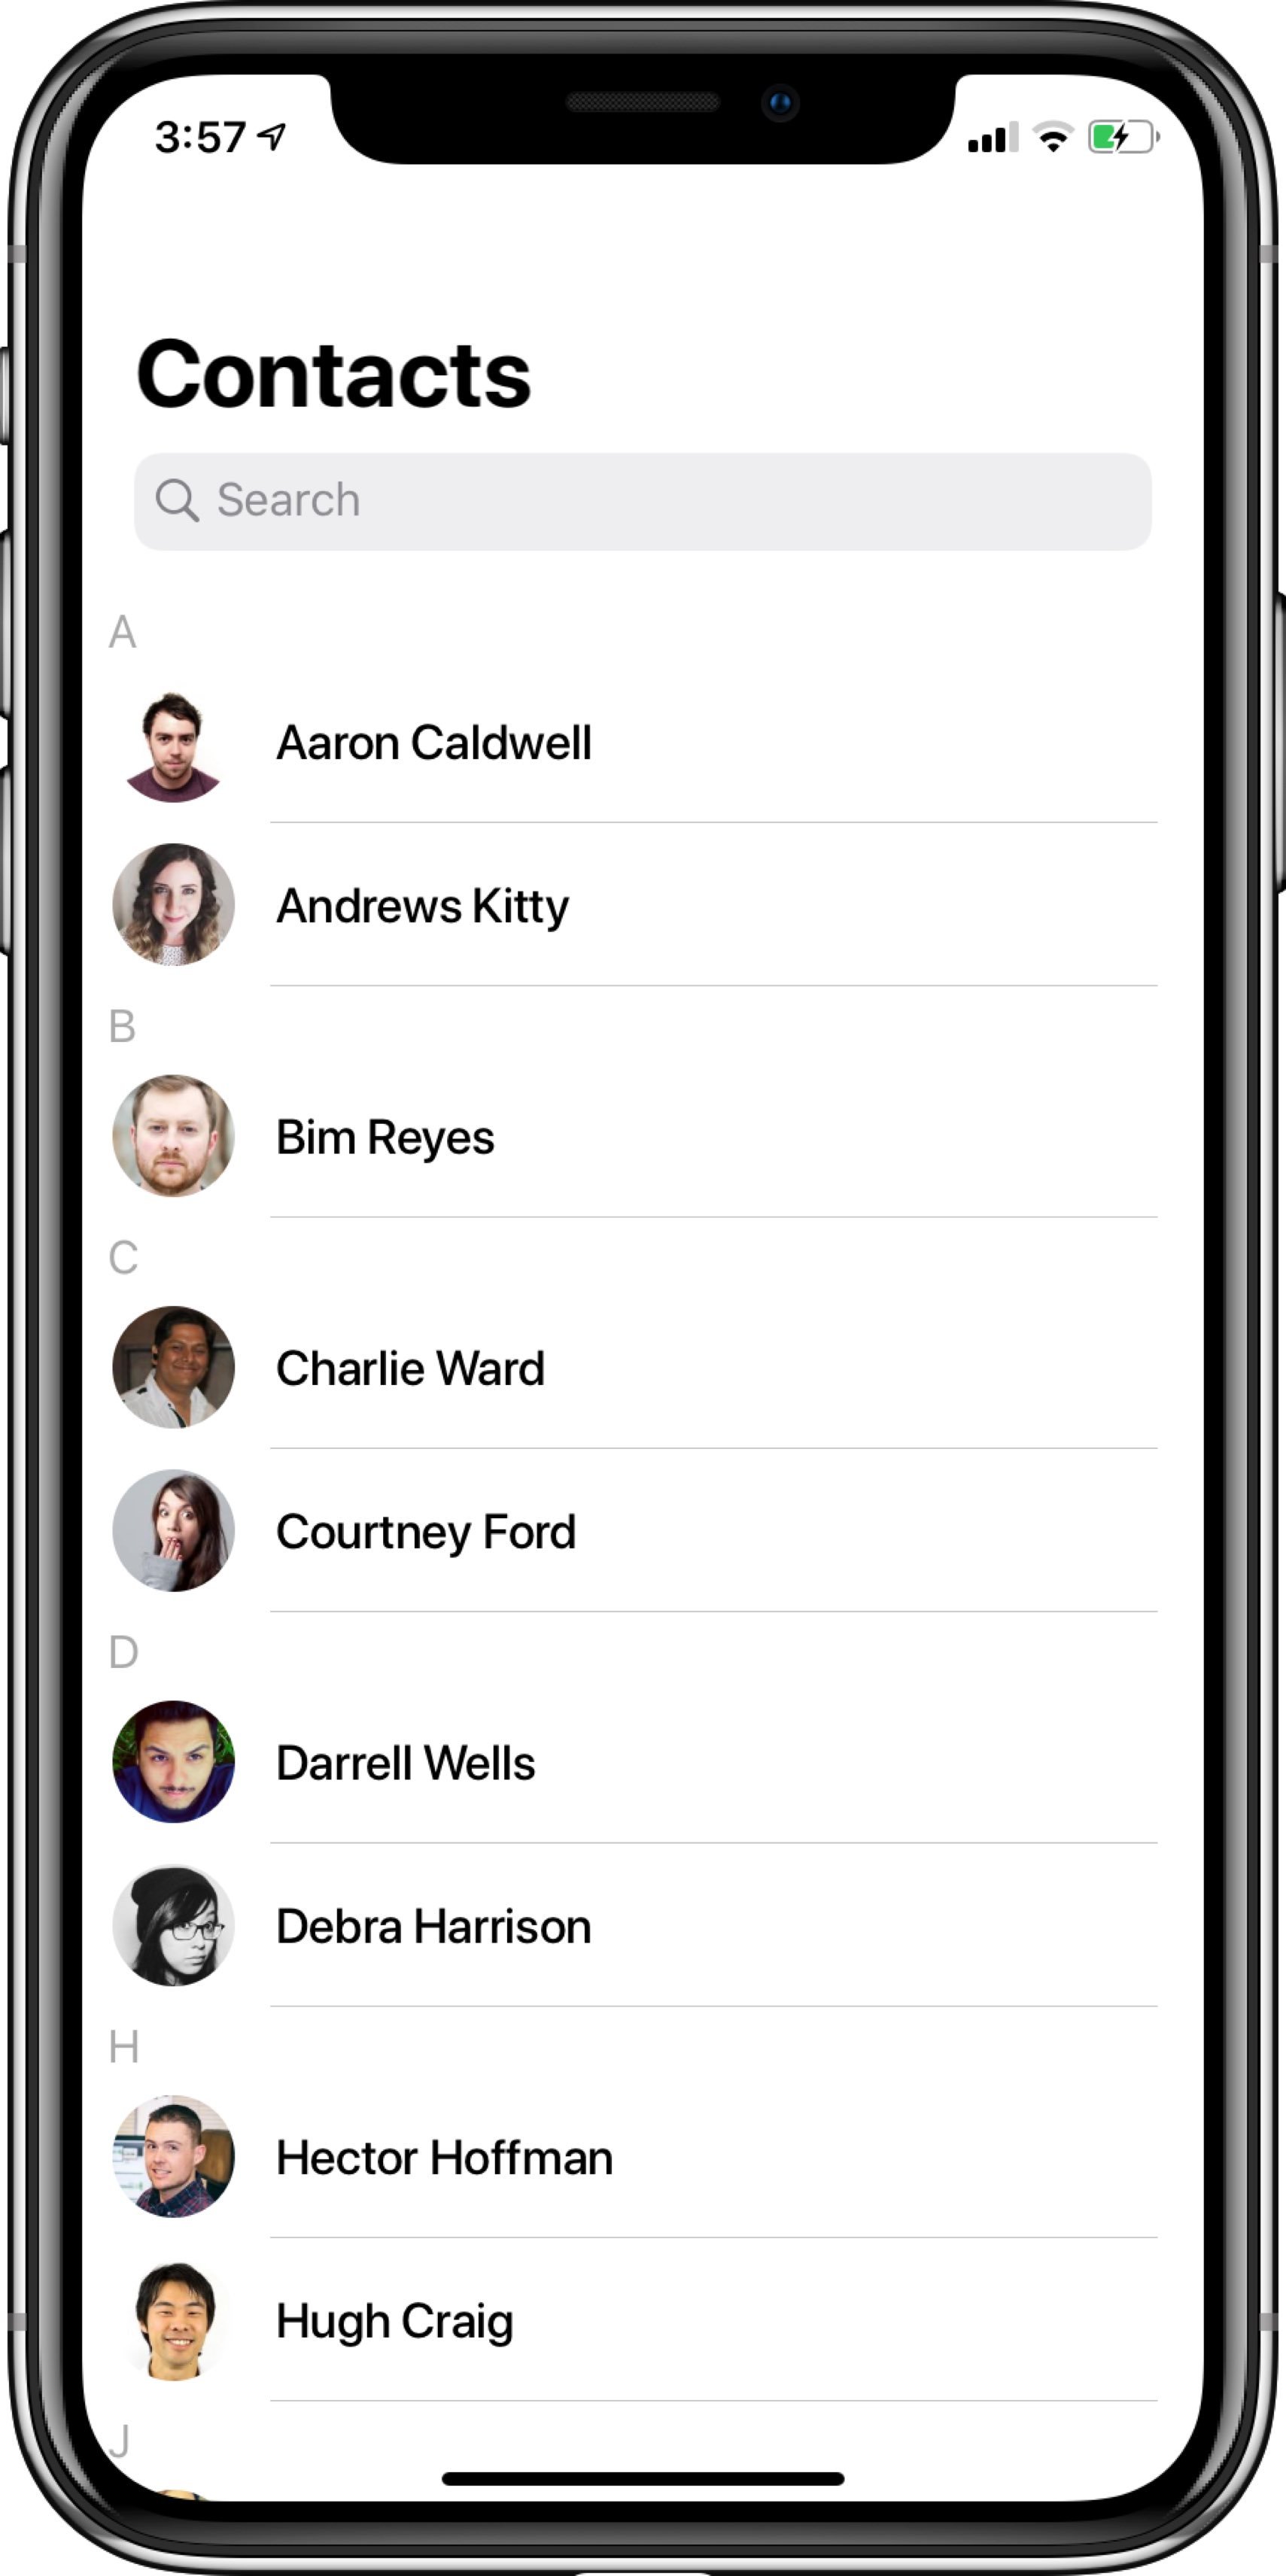
The **CometChatUserList** is a view controller with a list of users. The view controller has all the necessary delegates and methods.
You can present this screen using **two methods.**
### Launch User List (Recommended)
```swift theme={null}
let userList = CometChatUserList()
let navigationController = UINavigationController(rootViewController:userList)
userList.set(title:"Contacts", mode: .automatic)
self.present(navigationController, animated:true, completion:nil)
```
### Embed Call List in View Controller
You can use this by subclassing UIViewController as **CometChatCallsList** as shown below:
> To assign a CometChatCallsList to view controller make sure that the Navigation controller is attached properly.
```swift theme={null}
import CometChatPro
class viewController: CometChatCallsList {
override func viewDidLoad() {
super.viewDidLoad()
self.delegate = self
}
}
```
Also, you can perform an action on tap on the call by adding **CallsListDelegate** in the app's view controller as shown below:
```swift theme={null}
extension viewController: CallsListDelegate {
func didSelectCallsAtIndexPath(call: BaseMessage, indexPath: IndexPath){
//Do Stuff
}
}
```
## 4. CometChatUserList
The **CometChatUserList** is a view controller with a list of users. The view controller has all the necessary delegates and methods.
You can present this screen using **two methods.**
### Launch User List (Recommended)
```swift theme={null}
let userList = CometChatUserList()
let navigationController = UINavigationController(rootViewController:userList)
userList.set(title:"Contacts", mode: .automatic)
self.present(navigationController, animated:true, completion:nil)
```
 ### Embed User List in View Controller
You can use this by subclassing UIViewController as **CometChatUserList** as shown below:
> To assign a CometChatUserList to view controller make sure that the Navigation controller is attached properly.
```swift theme={null}
import CometChatPro
class viewController: CometChatUserList {
override func viewDidLoad() {
super.viewDidLoad()
self.delegate = self
}
}
```
Also, you can perform an action on tap on the user by adding **UserListDelegate** in the app's view controller as shown below:
```swift theme={null}
extension viewController: UserListDelegate {
func didSelectUserAtIndexPath(user: User, indexPath: IndexPath) {
//Do Stuff
}
}
```
## 5. CometChatGroupList
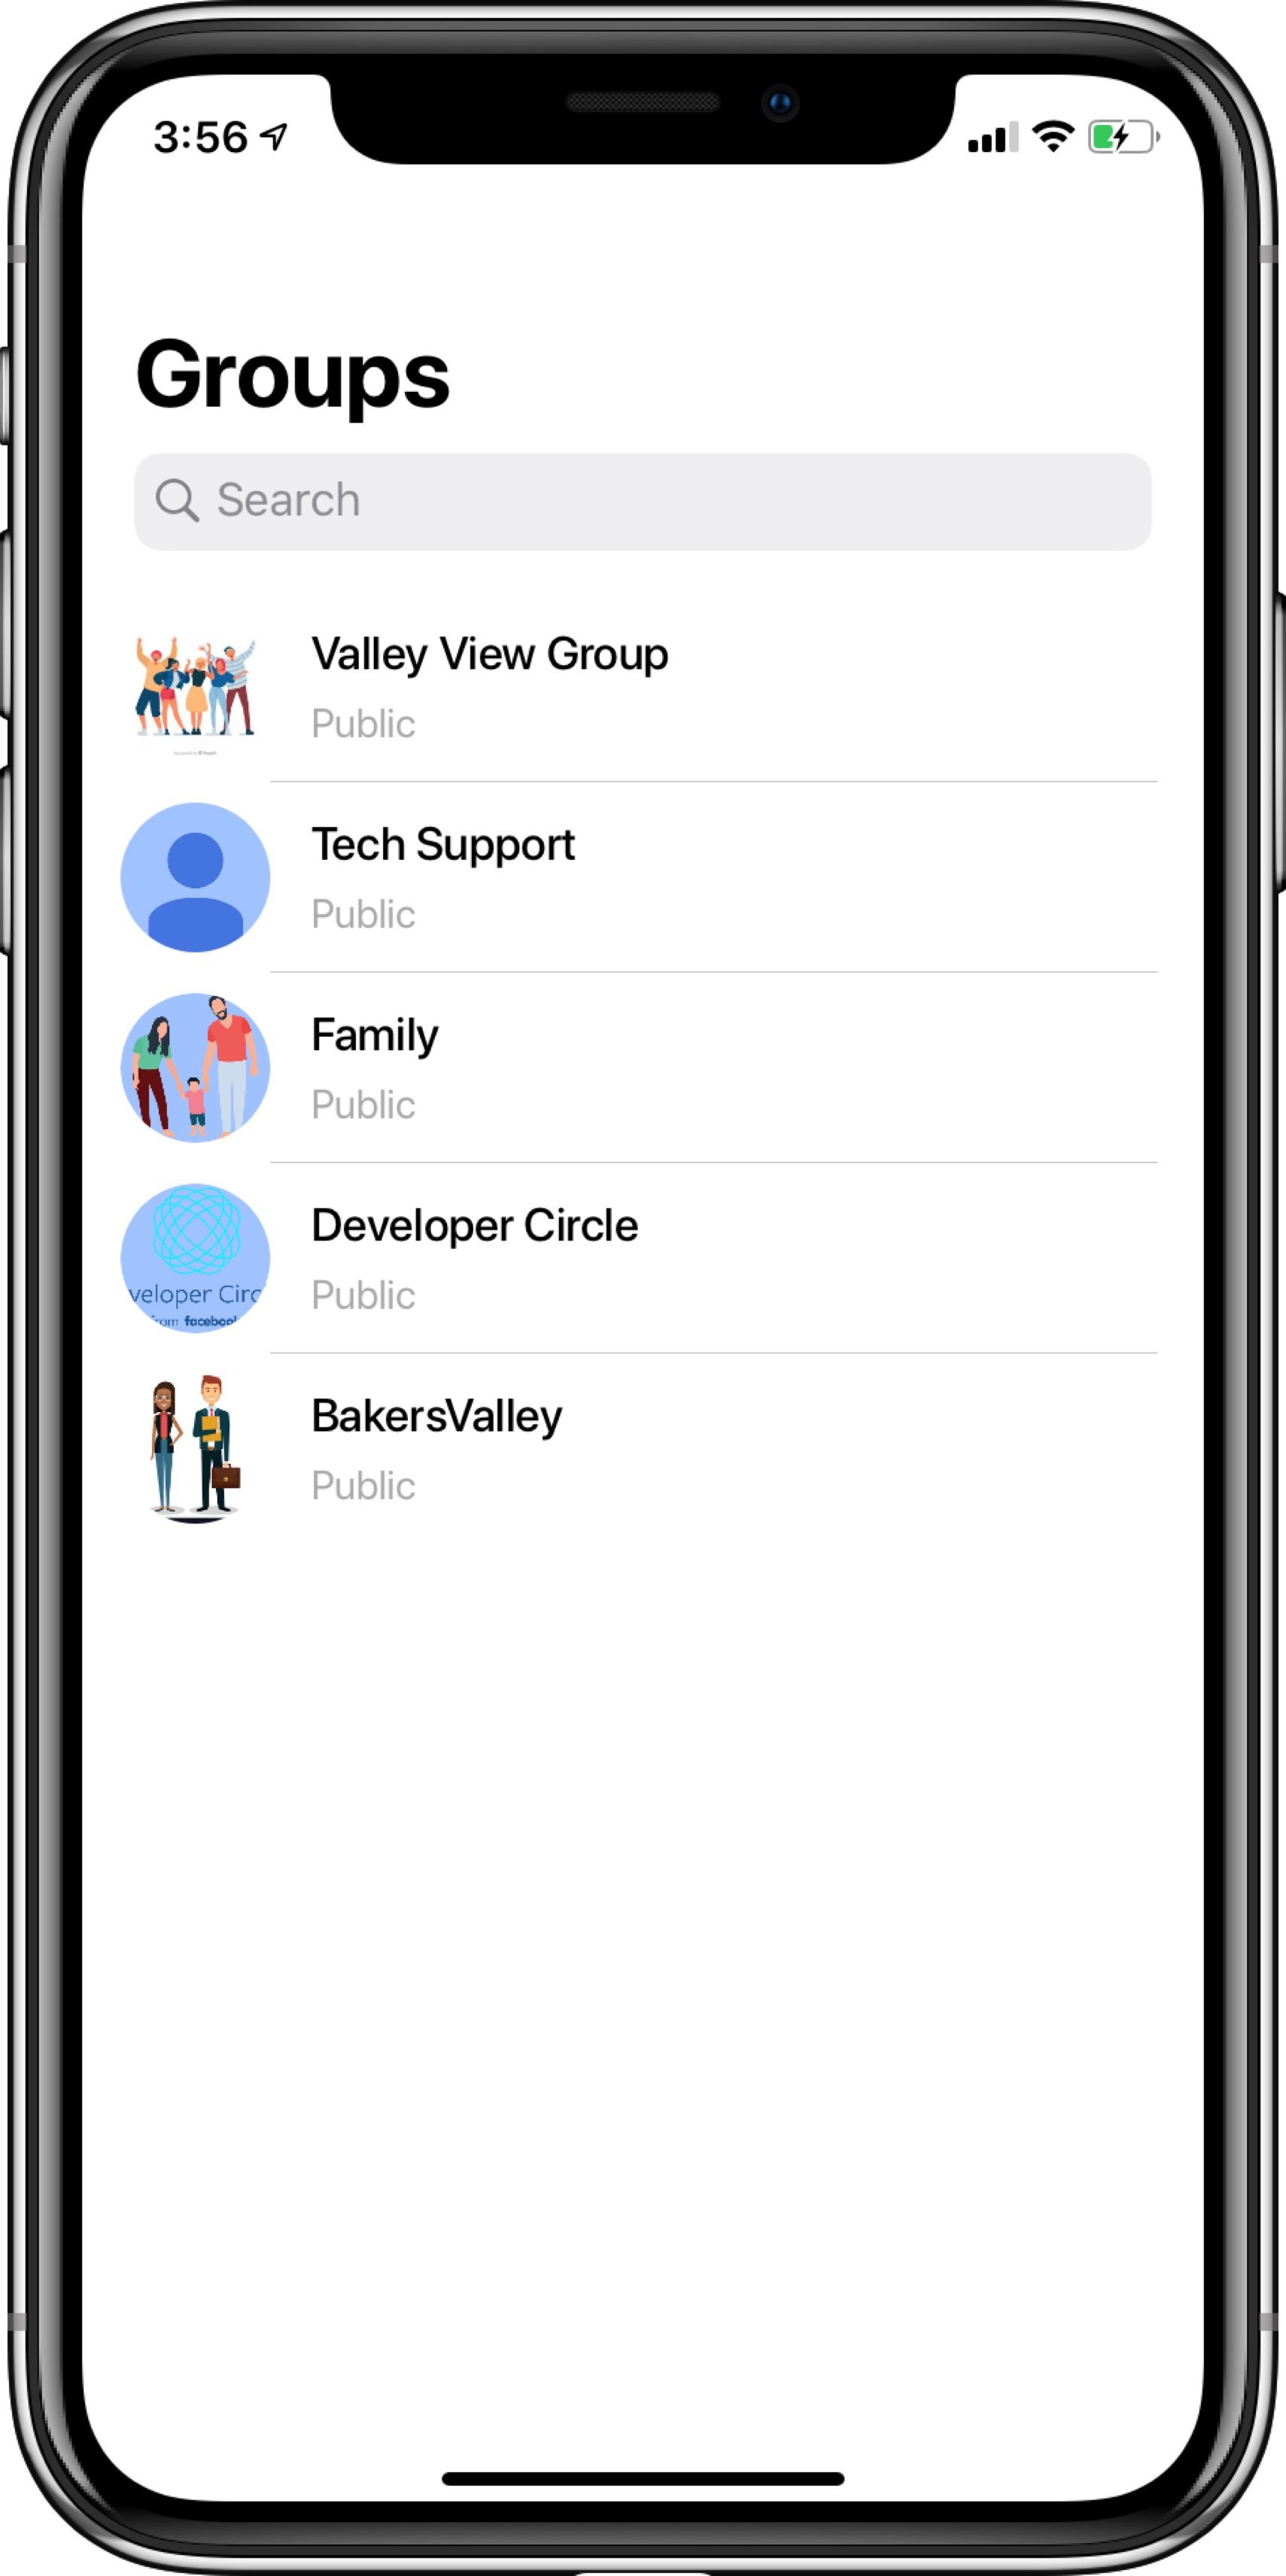
The **CometChatGroupList** is a view controller with a list of groups. The view controller has all the necessary delegates and methods.
You can present this screen using **two methods.**
### Launch Group List (Recommended)
```swift theme={null}
let groupList = CometChatGroupList()
let navigationController = UINavigationController(rootViewController:groupList)
groupList.set(title:"Groups", mode: .automatic)
self.present(navigationController, animated:true, completion:nil)
```
### Embed User List in View Controller
You can use this by subclassing UIViewController as **CometChatUserList** as shown below:
> To assign a CometChatUserList to view controller make sure that the Navigation controller is attached properly.
```swift theme={null}
import CometChatPro
class viewController: CometChatUserList {
override func viewDidLoad() {
super.viewDidLoad()
self.delegate = self
}
}
```
Also, you can perform an action on tap on the user by adding **UserListDelegate** in the app's view controller as shown below:
```swift theme={null}
extension viewController: UserListDelegate {
func didSelectUserAtIndexPath(user: User, indexPath: IndexPath) {
//Do Stuff
}
}
```
## 5. CometChatGroupList
The **CometChatGroupList** is a view controller with a list of groups. The view controller has all the necessary delegates and methods.
You can present this screen using **two methods.**
### Launch Group List (Recommended)
```swift theme={null}
let groupList = CometChatGroupList()
let navigationController = UINavigationController(rootViewController:groupList)
groupList.set(title:"Groups", mode: .automatic)
self.present(navigationController, animated:true, completion:nil)
```
 ### Embed Group List in View Controller
You can use this by subclassing UIViewController as **CometChatGroupList** as shown below:
> To assign a CometChatGroupList to view controller make sure that the Navigation controller is attached properly.
```swift theme={null}
import CometChatPro
class viewController: CometChatGroupList {
override func viewDidLoad() {
super.viewDidLoad()
self.delegate = self
}
}
```
Also, you can perform an action on tap on the group by adding **GroupListDelegate** in the app's view controller as shown below:
```swift theme={null}
extension viewController: GroupListDelegate {
func didSelectGroupAtIndexPath(group: Group, indexPath: IndexPath)
//Do Stuff
}
}
```
## 6. CometChatMessageList
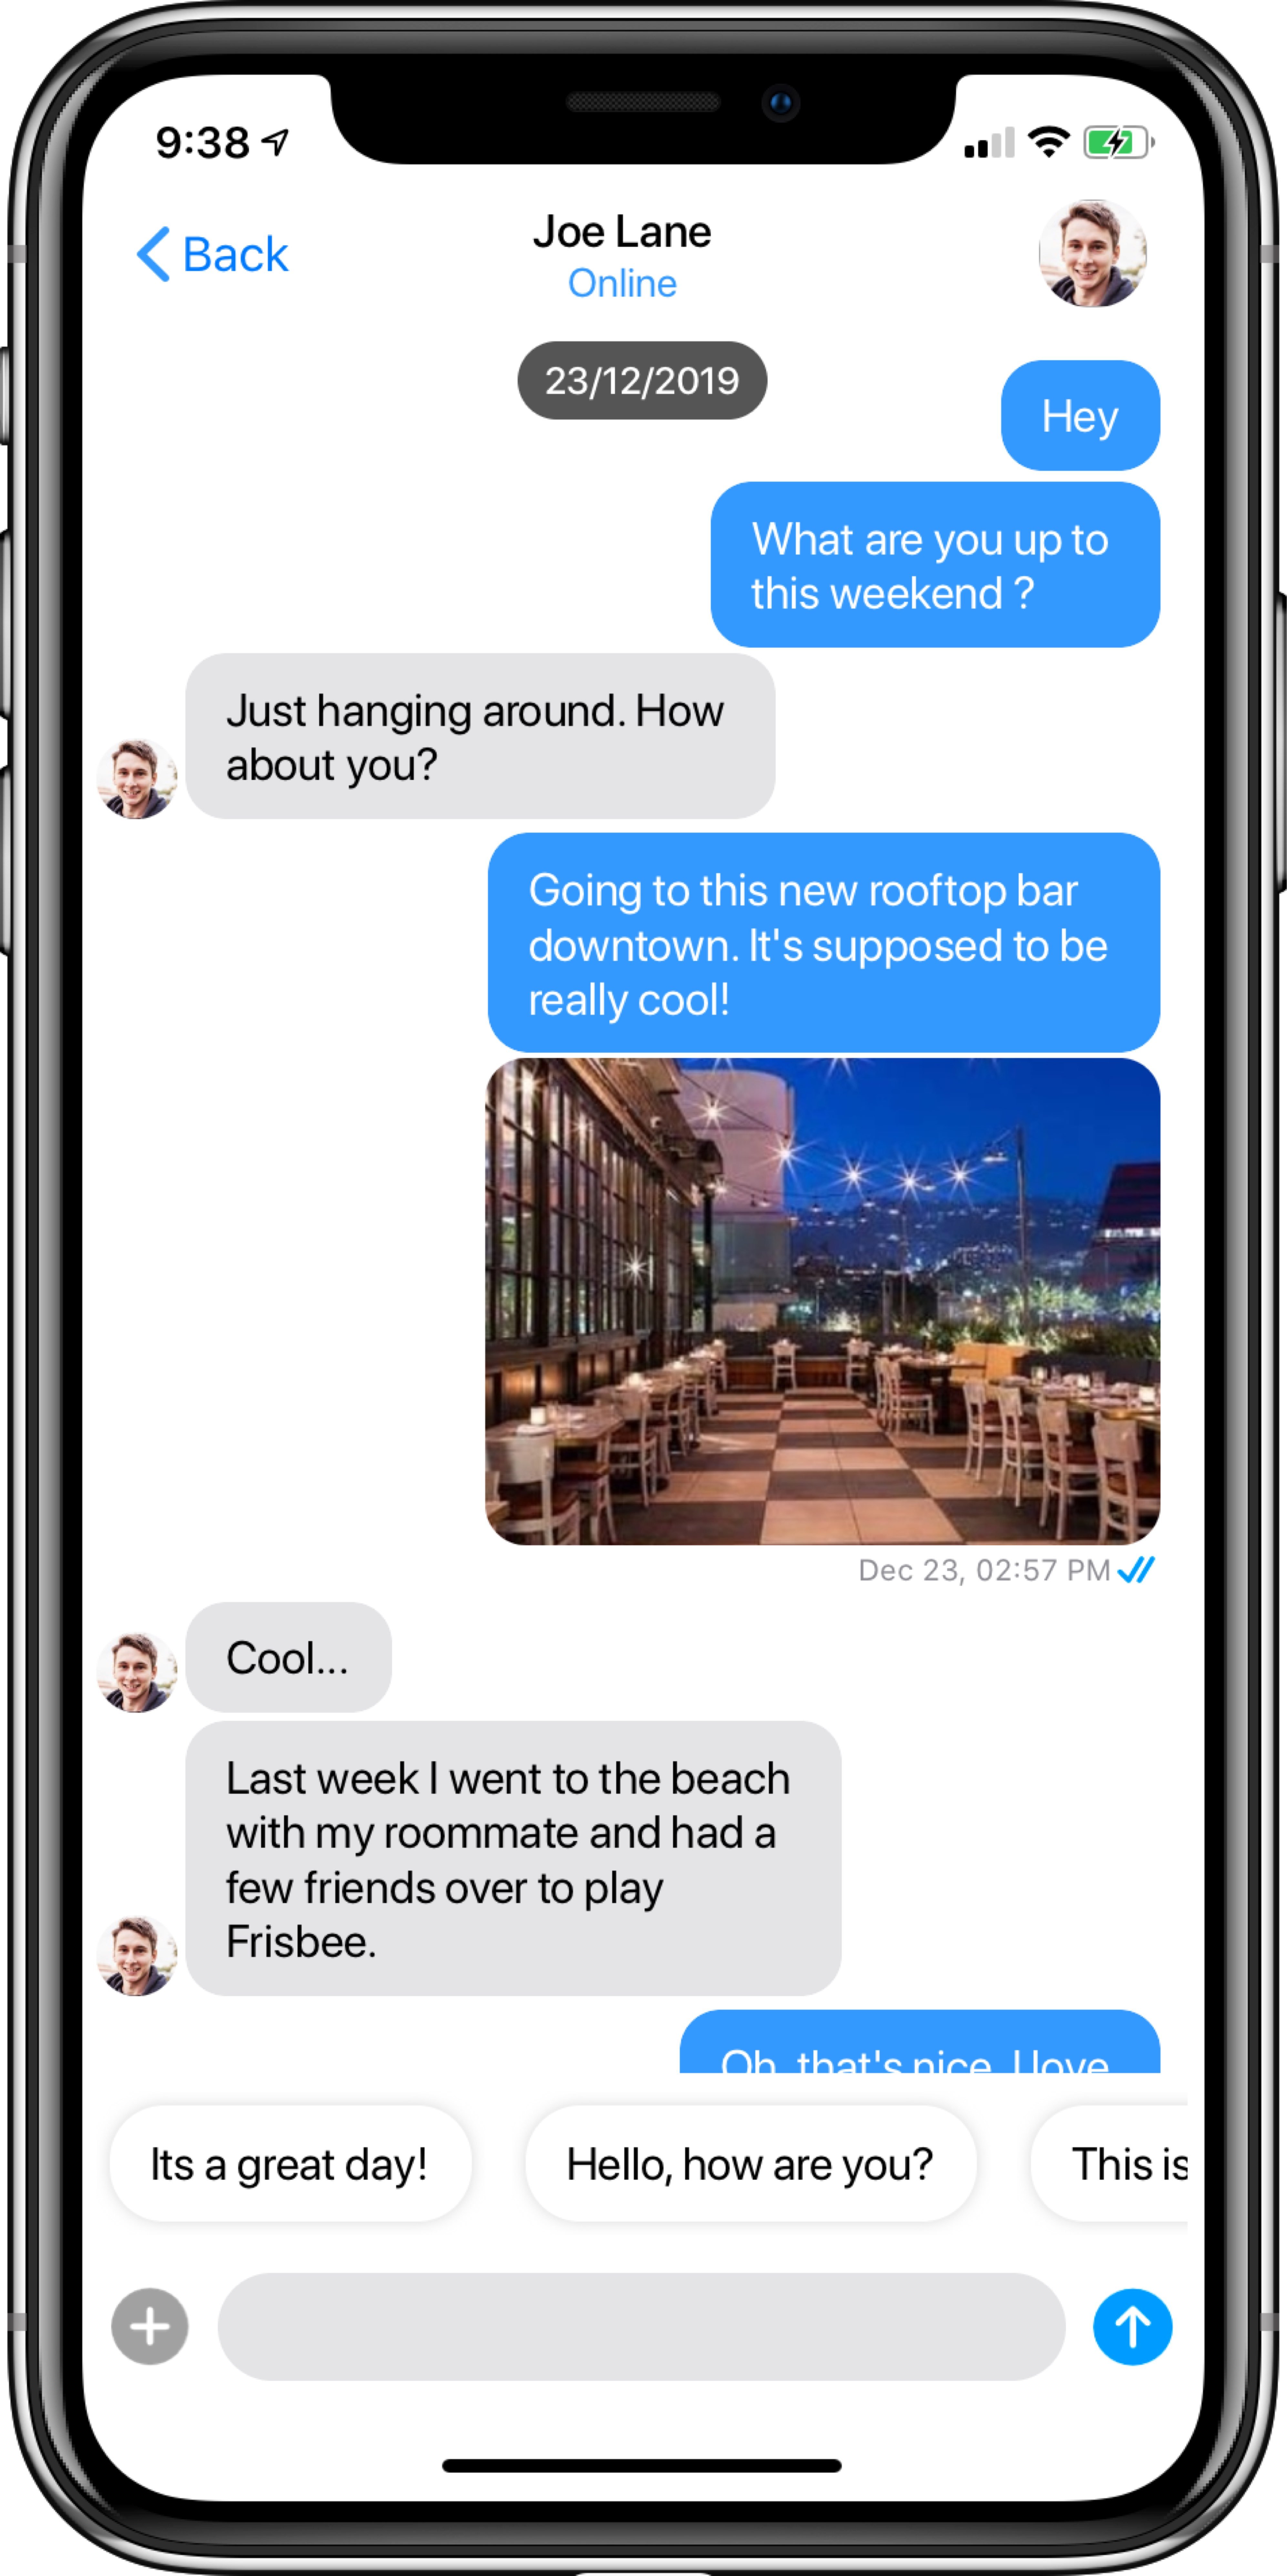
The **CometChatMessageList** is a view controller with a list of messages for a particular user or group. The view controller has all the necessary delegates and methods.
**CometChatMessageList** requires `User` or `Group` object to work properly.
> To retrieve the User or Group object you can call CometChat.getUser() or CometChat.getGroup().
You can present this screen using **two methods.**
### Launch Message List (Recommended)
```swift theme={null}
let messageList = CometChatMessageList()
let navigationController = UINavigationController(rootViewController:messageList)
messageList.set(conversationWith: user, type: .user)
self.present(navigationController, animated:true, completion:nil)
```
### Embed Group List in View Controller
You can use this by subclassing UIViewController as **CometChatGroupList** as shown below:
> To assign a CometChatGroupList to view controller make sure that the Navigation controller is attached properly.
```swift theme={null}
import CometChatPro
class viewController: CometChatGroupList {
override func viewDidLoad() {
super.viewDidLoad()
self.delegate = self
}
}
```
Also, you can perform an action on tap on the group by adding **GroupListDelegate** in the app's view controller as shown below:
```swift theme={null}
extension viewController: GroupListDelegate {
func didSelectGroupAtIndexPath(group: Group, indexPath: IndexPath)
//Do Stuff
}
}
```
## 6. CometChatMessageList
The **CometChatMessageList** is a view controller with a list of messages for a particular user or group. The view controller has all the necessary delegates and methods.
**CometChatMessageList** requires `User` or `Group` object to work properly.
> To retrieve the User or Group object you can call CometChat.getUser() or CometChat.getGroup().
You can present this screen using **two methods.**
### Launch Message List (Recommended)
```swift theme={null}
let messageList = CometChatMessageList()
let navigationController = UINavigationController(rootViewController:messageList)
messageList.set(conversationWith: user, type: .user)
self.present(navigationController, animated:true, completion:nil)
```
 ### Embed Message List in View Controller
You can use this by subclassing UIViewController as **CometChatMessageList** as shown below:
> To assign a CometChatMessageList to view controller make sure that the Navigation controller is attached properly.
```swift theme={null}
import CometChatPro
class viewController: CometChatMessageList {
override func viewDidLoad() {
super.viewDidLoad()
set(conversationWith: user, type: .user)
}
}
```
## 7. CometChatUserProfile
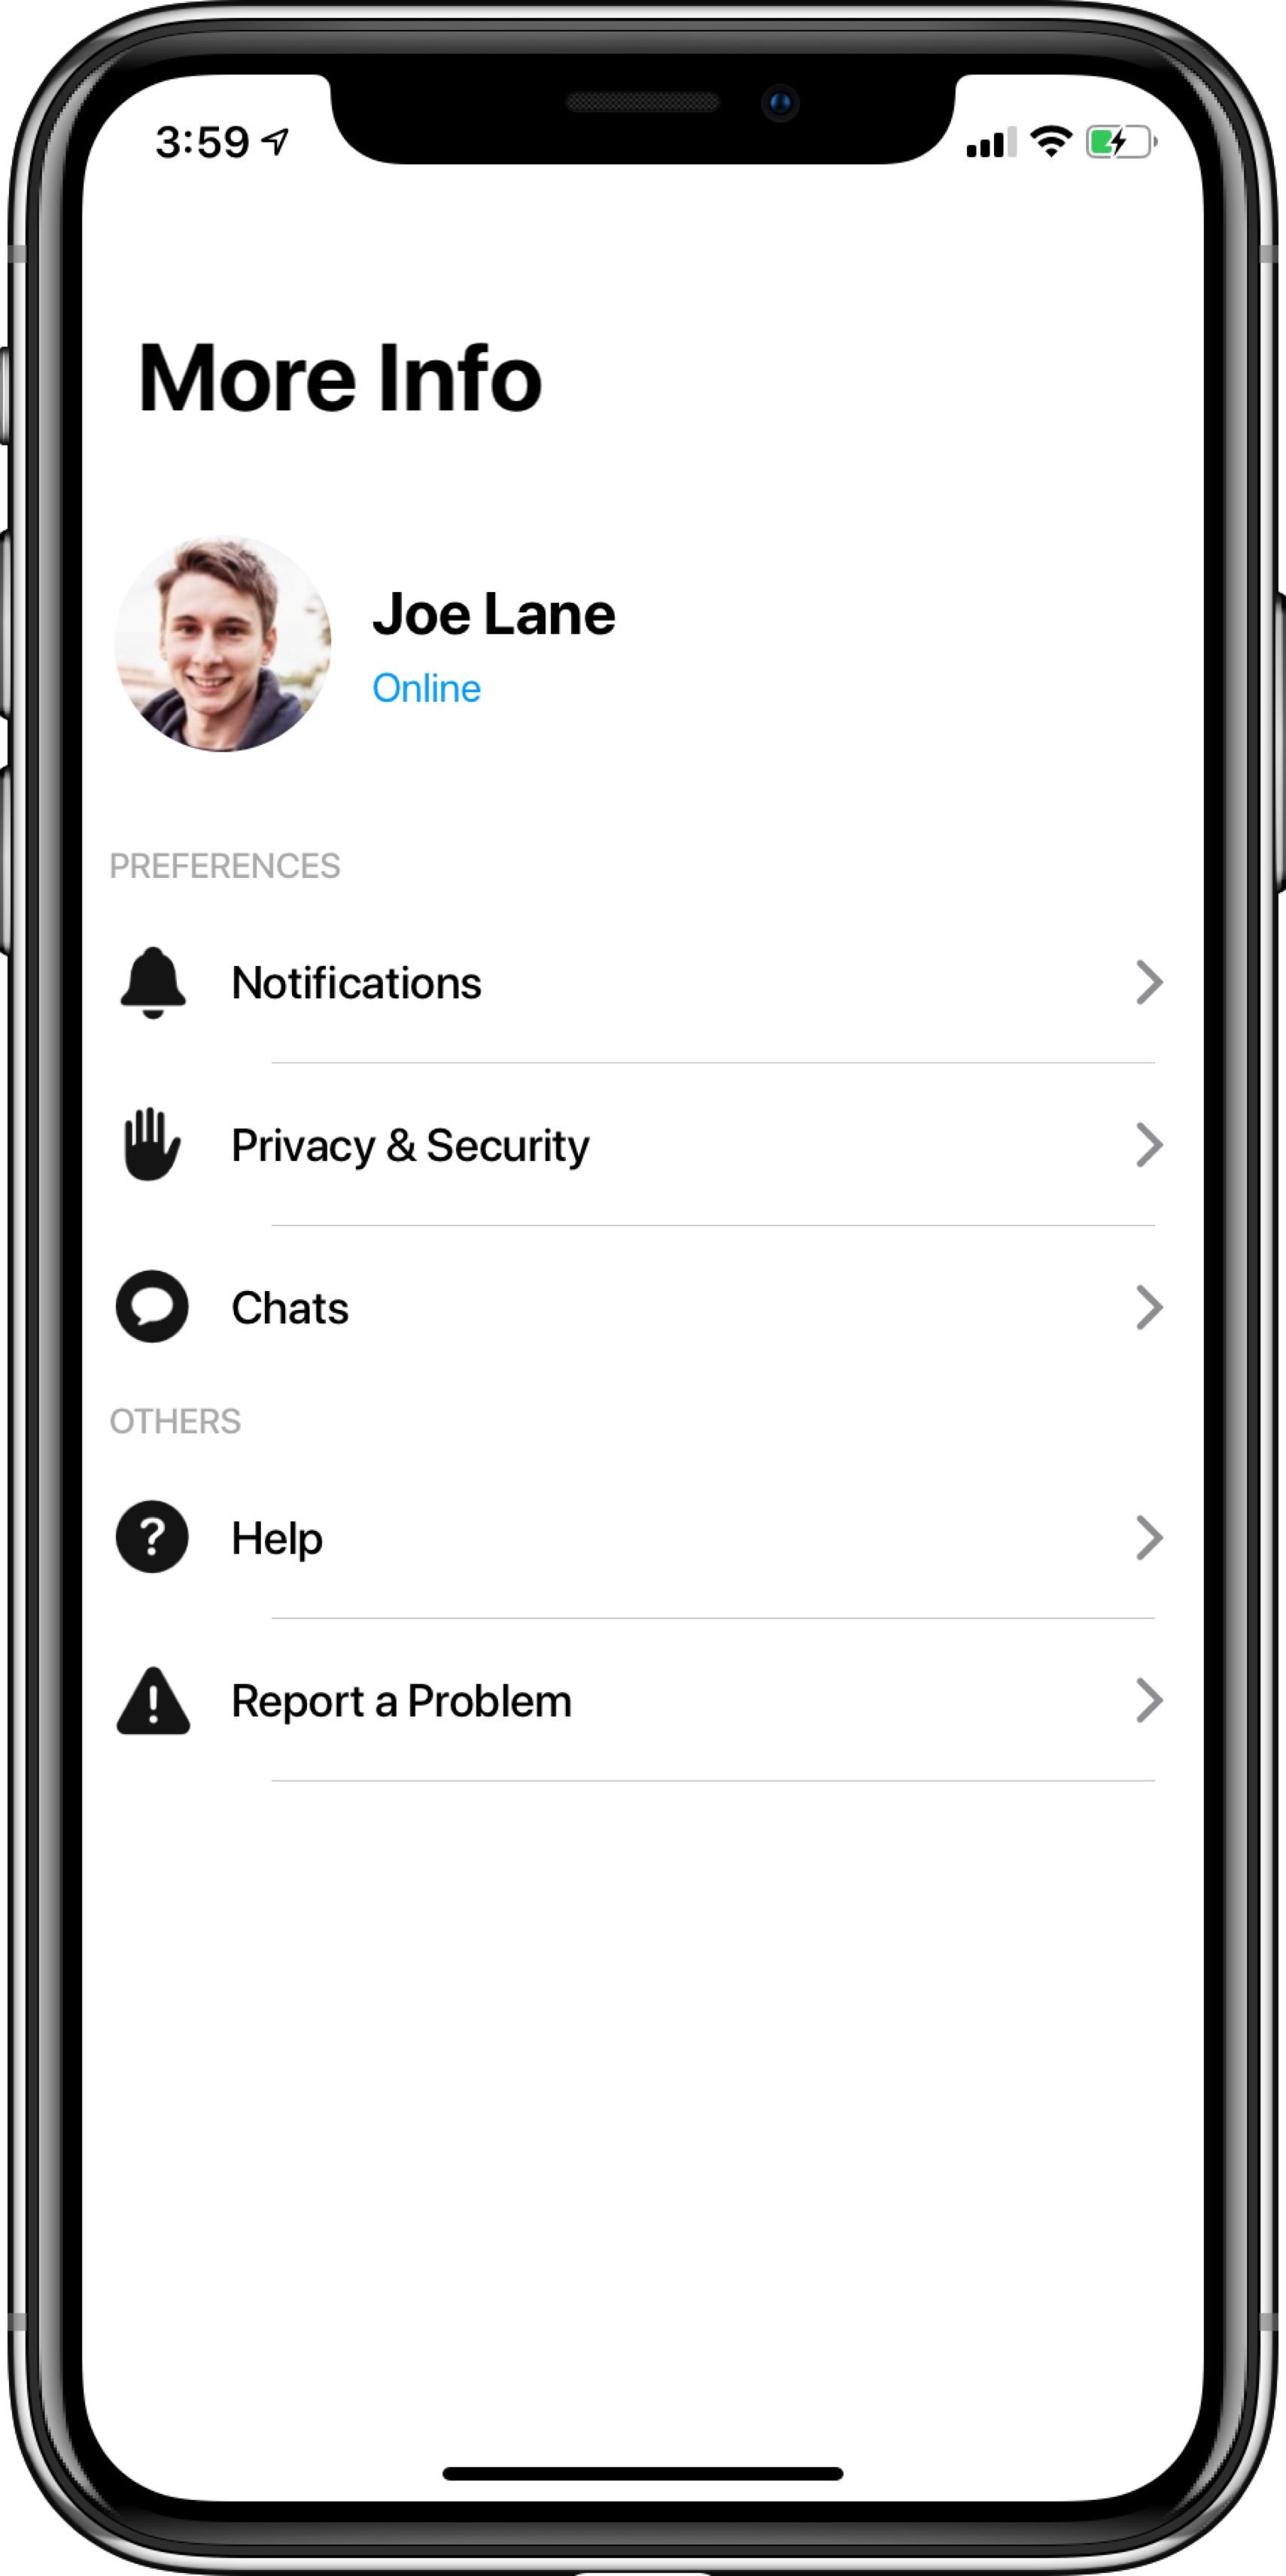
The **CometChatUserProfile** is a view controller with user information and a list of dummy cells for settings of the app which the developer can use in his app.
You can present this screen using **two methods.**
### Launch User Profile (Recommended)
```swift theme={null}
let userProfile = CometChatUserProfile()
let navigationController = UINavigationController(rootViewController:userProfile)
userProfile.set(title:"More", mode: .automatic)
self.present(navigationController, animated:true, completion:nil)
```
### Embed Message List in View Controller
You can use this by subclassing UIViewController as **CometChatMessageList** as shown below:
> To assign a CometChatMessageList to view controller make sure that the Navigation controller is attached properly.
```swift theme={null}
import CometChatPro
class viewController: CometChatMessageList {
override func viewDidLoad() {
super.viewDidLoad()
set(conversationWith: user, type: .user)
}
}
```
## 7. CometChatUserProfile
The **CometChatUserProfile** is a view controller with user information and a list of dummy cells for settings of the app which the developer can use in his app.
You can present this screen using **two methods.**
### Launch User Profile (Recommended)
```swift theme={null}
let userProfile = CometChatUserProfile()
let navigationController = UINavigationController(rootViewController:userProfile)
userProfile.set(title:"More", mode: .automatic)
self.present(navigationController, animated:true, completion:nil)
```
 ### Embed UserProfile inView Controller
You can use this by subclassing UIViewController as **CometChatUserProfile** as shown below:
> To assign a CometChatUserProfile to view controller make sure that the Navigation controller is attached properly.
```swift theme={null}
import CometChatPro
class viewController: CometChatUserProfile {
override func viewDidLoad() {
super.viewDidLoad()
}
}
```
### Embed UserProfile inView Controller
You can use this by subclassing UIViewController as **CometChatUserProfile** as shown below:
> To assign a CometChatUserProfile to view controller make sure that the Navigation controller is attached properly.
```swift theme={null}
import CometChatPro
class viewController: CometChatUserProfile {
override func viewDidLoad() {
super.viewDidLoad()
}
}
```